The following will Install and Configure vagrant over the top of a basic Centos 7.x server (without GUI)
CentOS Linux release 7.5.1804 (Core)
Software Install = @base
Let us install any prereqs and update server to latest
## Part 0 - Pre-reqs
yum install java-1.8.0-openjdk -y
java -version
#openjdk version "1.8.0_181"
#OpenJDK Runtime Environment (build 1.8.0_181-b13)
#OpenJDK 64-Bit Server VM (build 25.181-b13, mixed mode)
Java is needed for JFrog – otherwise it will fail to start. Now let’s get the binary and install
## Part 1 - Install Core Software
# URL to select is https://jfrog.bintray.com/artifactory-rpms/
wget https://jfrog.bintray.com/artifactory-rpms/jfrog-artifactory-oss-6.5.1.rpm
yum localinstall jfrog-artifactory-oss-6.5.1.rpm -y
Now let’s start the software
## Part 2 - Start Software
systemctl start artifactory.service
systemctl status artifactory.service

# Should now be listening on port 8081
netstat -ntlp | grep 8081
#tcp 0 0 0.0.0.0:8081 0.0.0.0:* LISTEN 13631/java

# Configure firewall
firewall-cmd --add-port=8081/tcp --permanent
firewall-cmd --reload
Now the service is running, we need to login and configure via the GUI. This process is effectively logging on the GUI and going through the Wizard (all defaults – only inputs are a password and select a Generic Repository)
Part 3 - Configure Software
# Click any of the images for a larger view


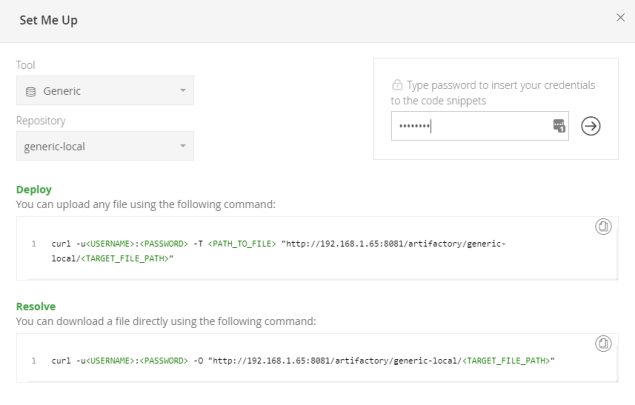
We now have a running software – so let’s upload some content
## Part 4 - Upload Content

# create samplepackage.rpm - effectively just a copy of a file we already have
cp jfrog-artifactory-oss-6.5.1.rpm samplepackage.rpm


curl -u admin:admin -T samplepackage.rpm "http://192.168.1.65:8081/artifactory/generic-local/samplepackage.rpm"
#output is below {
#"repo" : "generic-local",
#"path" : "/samplepackage.rpm",
#"created" : "2018-10-19T10:21:13.524+01:00",
#"createdBy" : "admin",
#"downloadUri" : "http://192.168.1.65:8081/artifactory/generic-local/samplepackage.rpm",
#"mimeType" : "application/x-rpm",
#"size" : "100307699",
#"checksums" : {
#"sha1" : "931b804db5fb9279b50f5da687e74ed24bf5a05f",
#"md5" : "1038630aa6dd31283abe4e026f99aee3",
#"sha256" : "b76c236ed5eac237c584edc97ce57046d192c51af347ef0d5db9d9c5358f8445"
#},
#"originalChecksums" : {
#"sha256" : "b76c236ed5eac237c584edc97ce57046d192c51af347ef0d5db9d9c5358f8445"
#},
#"uri" : "http://192.168.1.65:8081/artifactory/generic-local/samplepackage.rpm"
#}
You can identify the values from the GUI too!
You can now see the content using the browser
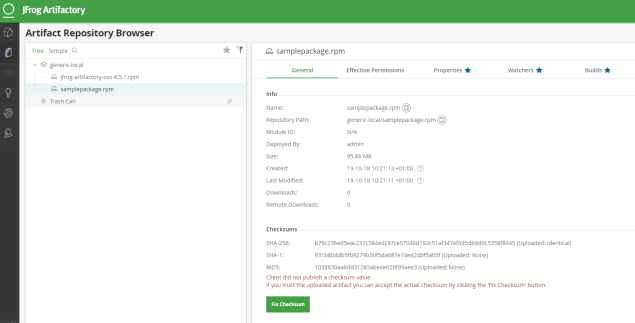
Now let’s delete the file locally and download some content
Note you can get the URL from the image above – get the address from the ‘Download’ link
## Part 5 - Download Content
rm -f samplepackage.rpm
ls samplepackage.rpm
#ls: cannot access samplepackage.rpm: No such file or directory
wget http://192.168.1.65:8081/artifactory/generic-local/samplepackage.rpm
